Tuesday, November 30, 2010

Who Dirtied the Water


Who Dirtied the Water is an excellent activity found in the Access Excellence Fellows Collection.  

In short...
...you begin with some nice clean water from an undisturbed lake.  Beavers come and add some wood chips to the lake and a river washes sand into the lake.  People begin to settle the area and their waste enters the lake.  Soil from farm fields washes into the lake.  Eventually a city grows there, with houses, laundromats, factories, etc.  Each of these new additions adds something to the lake.  

As you read the story, students come and add the material to the water.  Periodically throughout the story, you ask the students if they'd want to swim in that water, eat fish caught in that water, or boat in that water.  

It's a powerful demonstration of what can happen to a water source over time.  And it's great for staring a discussion.  Students will have all different ideas of how dirty is too dirty.  And at the end, you get to the big questions - who made the water dirty and even bigger - who's responsible for cleaning up the water.  


It's a fantastic activity.  I most recently used it as part of the local library's summer reading program.  Since there were young (preschool) children taking part, I made a few changes.  

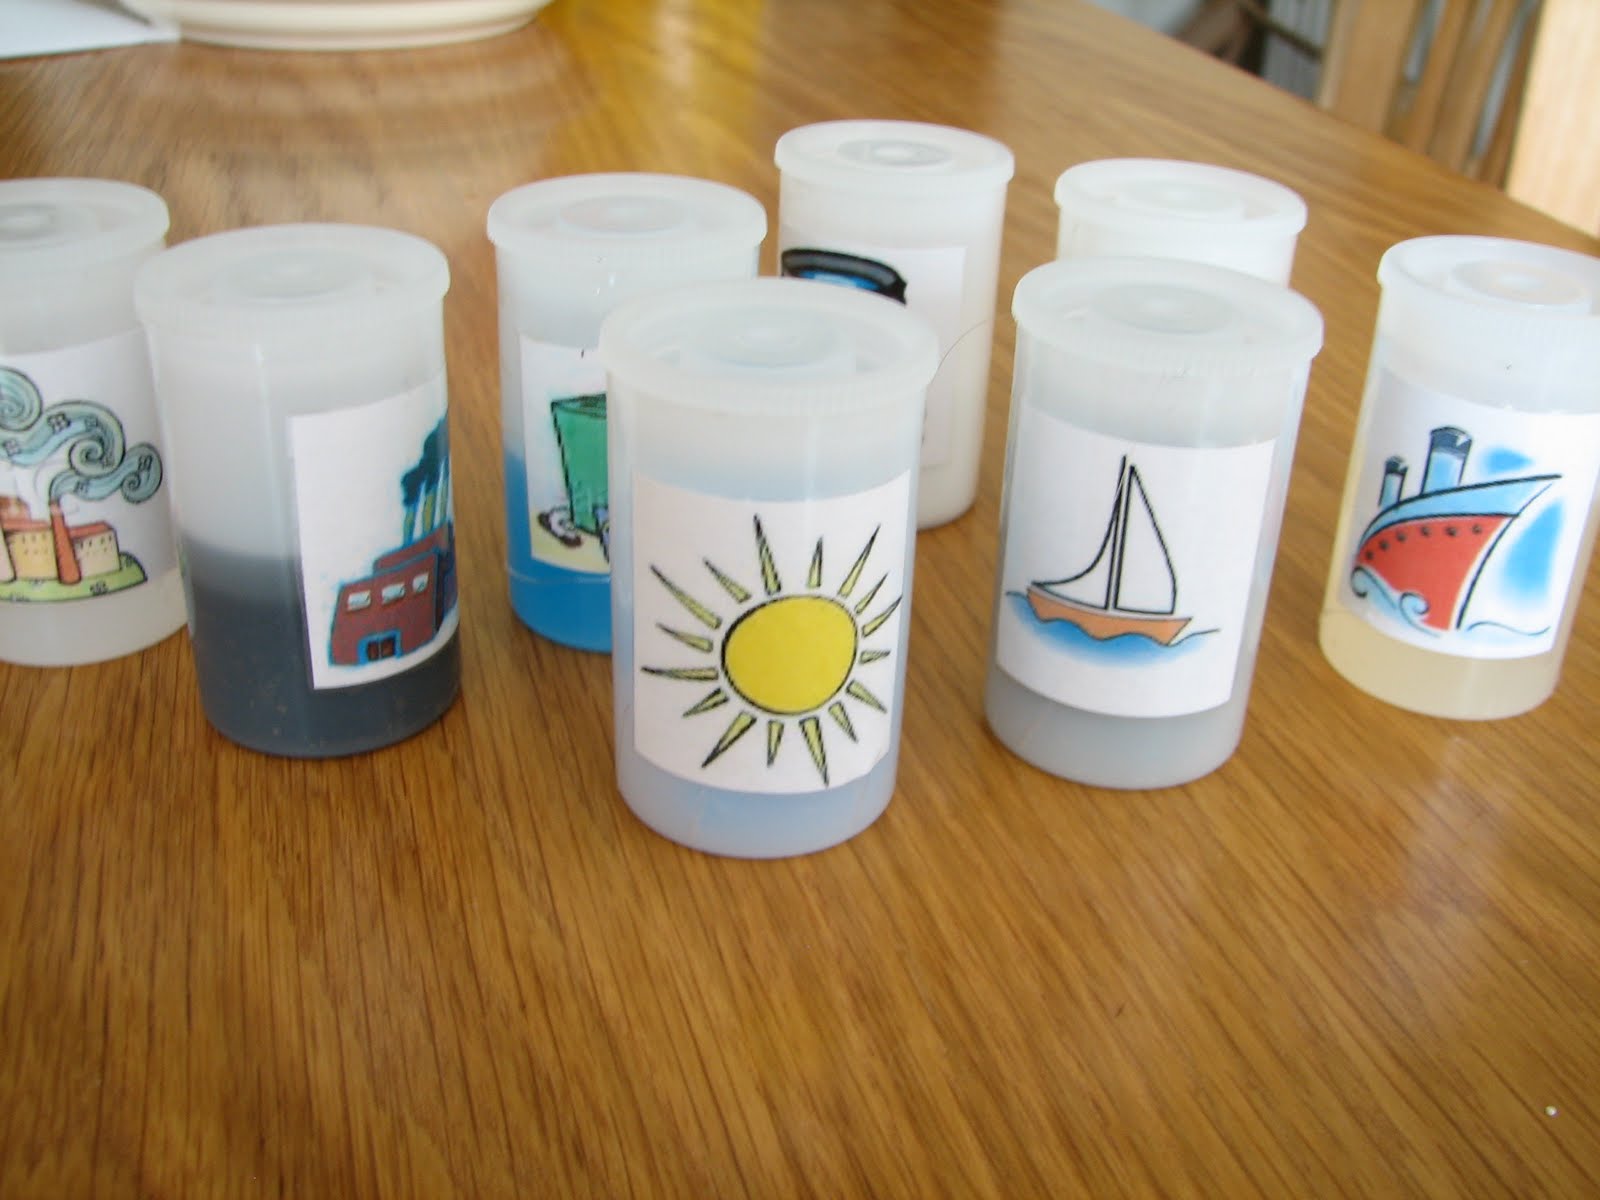
I made a name tag for each part, which contained a picture as well as the name.  The film canisters were labeled with pictures that matched those on the name tags.  These modifications made it more meaningful for children who are not yet reading, as well as making it easier for them to participate. 

For a nice progression of activities, start with Earth Ball Catch (land vs water on Earth), then do Earth's Water Necklaces (salt water vs. fresh water on Earth), and then do Who Dirtied the Water (take care of the tiny amount of fresh water available).

Monday, November 29, 2010

Bernoulli: Ball in a Cup

Challenge your students to get the ping pong ball out of the cup* following this 1 rule:
     ~~They cannot touch the cup or ball with any part of their body.~~

The only way I know of to complete this task is to apply Bernoulli's Principle by blowing across the top of the cup and ball, allowing the ball to rise.

If that's too easy, you can add a second step to the challenge and have the students move the ball from one cup to another without touching anything.


*Try out the cup you plan to use ahead of time.  If the cup is too deep, it won't work.  If you use a paper cup, you can always cut the sides down.  But, be careful, if the cup is too shallow, students will just blow the ball out and not put Bernoulli to use.  I found that a cordial glass (see below for a cordial glass story) works well, if you have one shaped like mine!


Here's the story... when we were little (like, before we started school), my cousins, brother and I drank apple juice out of mini wine glasses at my Grandma's on special occasions, like Easter.  I was in college before I realized that those glasses were not in fact miniature wine glasses made for small children to use when the grown ups were drinking wine, but were really cordial glasses.  :)  Who knew?!?!

Friday, November 26, 2010

Book: Odd Boy Out

Odd Boy Out: Young Albert Einstein
This is a nice picture book biography of Albert Einstein. 

Most of Einstein's work is so upper-level that elementary and middle school students don't have reason to study this great mind.  That said, most of those students have at least some passing knowledge of Albert Einstein and many of them can rattle off E=mc2 (even if they have no idea what that means).  As a result, at some point during the year, you will likely find yourself hearing some mention of Einstein in your classroom. 

Instead of shrugging it off, why not share this story with your students.  It will give them a bit more of his story, and what a story it is.  The man whose man has become synonomous with genius wasn't always thought to be so bright.  He really didn't like school and people found him to be odd.  You might find some or your students can relate to Einstein's childhood - and it's a good reminder to all of us that you can't know a person by outward appearances. 

Wednesday, November 24, 2010

Cell Processes: Modeling Endocytosis: The Jelly Bean Problem

I just refer to this activity as modeling endocytosis, but you might not want to refer to it that way, as it may give too much away to your students.  

It comes from the Access Excellence collection and is named The Jelly Bean Problem.

In short, the students are trying to get a handful of candy into a plastic bag following these rules:

  • The candy must enter through a solid part of the bag.
  • The inside of the bag may not be directly open to the external environment.
  • The candies entering the bag must remain clustered together.
  • Students may work with their hands in the bag to act as the inside of a cell.
  • The candy may be eaten only if it enters the bag "cell" under the specified conditions. 
Check out the original version for a nice illustration of how to accomplish this goal.

It's fun, candy is always an attention-getter, and it relates directly to cells.

Tuesday, November 23, 2010

Rotate/Revolve Model


Make this simple model to demonstrate the differences between rotation and revolution.

Thread a practice golf ball onto a pipe cleaner.  Twist the pipe cleaner closed, to make a loop. 

To show rotation: spin the ball.

To show revolution: slide the ball around the pipe cleaner.

The materials are so simple and inexpensive, you could make a classroom set of these and have students try it out themselves.  


You can make a larger scale model using a hula hoop and a wiffle ball.  You will have to cut part of the ball open to get it around the hula hoop. 

Monday, November 22, 2010

States of Matter Dance

Get your students out of their desks and moving, acting like molecules in the different states.

Solid: students are clustered together, minimal movement

Liquid: students move a bit away from each other, but still close enough to reach out and maintain contact, slow walking and arm movements

Gas: students break away from each other and try to spread out as far as they can, walking and moving their arms at a rapid pace

*Try playing a game of Simon Says using these movements
*Try to find music to match each state of matter
*Have students write a story about what it's like to be a molecule that spends time in each state

Friday, November 19, 2010

How Does That Work: Magic Marble

A "marble" that hovers right in the middle of the cup.  Can your students explain it? 
{It's all about density and immiscibility}

Fill a cup between 1/3 and 1/2 full of water.  Add a drop of two of food coloring.

Use a dropper to place a couple of blobs of cooking oil on the water.

Tilt the cup and pour in rubbing alcohol.  (You want to pour the alcohol down the side of the cup, so you don't mix the water and alcohol and also so you don't disturb your oil blobs).

Add a drop or two of food coloring to the top of the cup, if needed.

[If you wish for something a bit more permanent, create your magic marble in a jar and cover with the lid.  


To keep your "marble" hovering in the liquid, don't shake or disturb the cup.  If you're curious what happens if the alcohol and water are mixed, make a hypothesis and have at it!


*****************
How Does That Work is a series of products and demonstrations that you can present to your students and challenge them to explain the science of how they work. Make sure you decide ahead of time what you'll accept as a valid explanation - can it be printed straight off the internet, written in the student's own words, or does the student need to be able to explain it to you conversationally? What will a valid explanation earn the student - a prize, extra credit, a feeling of goodness?

Thursday, November 18, 2010

Layered Water

This is a lovely demonstration of the way water's density differs with temperature and convection currents (you don't actually see the currents, but you see the end result).

Allow a pitcher of blue-colored water to cool in the refrigerator overnight. 

At demonstration time, prepare a pitcher of hot tap water.  Color this water yellow.

Fill a jar (or cup) all the way with blue water.  Fill an identical jar all the way with yellow water.

Place an index card on top of the blue jar.  Carefully turn the jar over and set it on top of the yellow jar - make sure the rims line up.

Ask for hypotheses as to what will happen when you slide the card out.  Slide the card out -- the blue water sinks, mixing with the yellow, creating green water.


Now try again....
Prepare the jars in the same way.  But, this time, place the index card on the yellow jar, and place the yellow jar on top of the blue jar.

Remove the card and watch.....

You'll get a little green water right at the interface, but the yellow and blue water will mostly remain separate.


Why did you get two different results? 
Cold water is denser than hot water - it sinks.  When the cold water was on top of the warm, it sank to the bottom of the vessel, mixing with the warm, as evidenced by the mixing of colors.

When the cold water was on the bottom, it was content to stay right there.  Just a little mixing occurs right where the two temperatures meet.  What do you think would happen if you allowed it to sit for awhile?  Would the colors remain separate, or would they eventually mix?

Wednesday, November 17, 2010

History of the Microscope Foldable

Before learning to use the microscope, my students always get a brief lesson on the history of the microscope.  I don't place a whole lot of emphasis on the dates, more on the order in which the events occurred.  I do point out that most of the last three events didn't occur until after the US was a country (for a awhile), approaching Civil War time. 

Anyway, I've had my students create various forms of timelines to go with this lesson over the years, but I think this one might be my favorite. 

Each student needs 7 index cards and one piece of construction paper. 

The index cards get folded in half.  On the 'cover' goes the date and the scientist.  Inside the card goes the scientist's contribution. 

The folded cards get glued to the construction paper. 

The folded cards are a nice way for students to quiz themselves. 

My events:
1300s   Italian monks... ...begin grinding lenses.
1590    Janssen... ...compound microscope
1665    Hooke... ...looked at cork; coined the term "cells"
1665    Leeuwenhoek... ...discovered "animolecules" (which were acutally bacteria)
1838    Schleiden... ...plants are made of cells
1839    Schwann... ...animals are made of cells
1855    Virchow... ...all living cells come only from other living cells

Tuesday, November 16, 2010

Fossil Footprints

I'm really proud of this activity - it's one I came up with on my own.  Maybe someone else out there has done it, but I didn't know about it when I tried it!

This is an activity in which students can make their own fossils - fossils of footprints.

The most difficult part of this activity is locating the rubber stamps to use.  I thought the set pictured above came from Ward's Natural Science, but I cannot find it there or at any of the other suppliers I've used.  Amazon does have a similar set here; they are clear plastic stamps instead of wooden stamps, but that shouldn't make a difference.

The good news is, once you acquire the stamps to use, you'll be set for as many times as you wish to do this!

Each student will need:
--A small piece of clay
--A small piece of Model Magic or other air-dry clay or Play-Doh*
--A length of lanyard

To make the fossils:
--Flatten the piece of regular clay into a pancake.
--Use the stamps to make footprint impressions in the clay pancake.  I like to keep my designs simple with just one type of footprint, but your students will likely want to try as many as they can!

--Use your fingers to flatten the piece of Model Magic into a pancake about the same size as the clay.
--Place the Model Magic pancake on top of the clay pancake. 
--Gently push the Model Magic onto the clay, rubbing your finger over the entire surface.

--Use a skewer or the tip of a pen to make a small hole in the Model Magic.
--Place in a safe spot to dry.*
--When dry, pull the clay away from the Model Magic.  The clay can be saved to use again next time - store in a plastic bag.
--Observe the fossil footprint you made.

--Thread the lanyard through the fossil and wear proudly!

*Model Magic clay dries very quickly - in a day or so, which is really nice for this project.  However, it can be on the expensive side, so I started to experiment with other alternatives.  I found that Play-Doh fits the bill, however, it takes quite a few days to dry out until it's hard (which is funny, because the Play-Doh that gets left out around my house always seems to dry out in record time.... ).  There is another advantage to the Play-Doh, once it's finally dry, it's hard!  The Model Magic remains kind of flexible, and if the students pull on it, the lanyard will rip right out. 

BTW, you don't have to use footprint stamps.  You could use any other kind of stamp or use other random objects to make impressions.  I just happened to have the stamps, but I do think they add a certain realism to the project.

Monday, November 15, 2010

Density Meltdown

This one is so very simple, but you can learn several things about density while watching.  

Fill a jar with vegetable oil.  Drop in an ice cube.  Watch what happens.


PS My apologies for not using an ice cube made of colored water.  But I think you can still see what's going on.  

Friday, November 12, 2010

Magic Loop

Cut a length of thread or string about 30 cm long.  Tie it into a loop.

Place the loop on the table and try to form a circle with it.

Fill a pie plate with water and place the loop on the surface of the water.

Place a drop of dish soap in the middle of the loop and watch.

The loop forms a circle on its own*!

The soap lessens the surface tension in the middle of the loop, but the tension outisde the loop are still at full strength and pull on the thread from all directions.


*You have to be watching carefully to see the circle as it's a fleeting thing that can't be repeated without dumping the water, scrubbing the pan and starting again (once the soap breaks the surface tension, you can't put it back together again).  You have to act even faster if you want to get a picture of the perfect circle... 

Thursday, November 11, 2010

Crooked Pencil

Fill a glass with water.

Place a pencil in the water.

Look through the side of the glass at the pencil - what do you see?


The pencil looked bent because light travels slower through water than it does through air.  This causes the light rays to bend - refraction.

Wednesday, November 10, 2010

Cell Processes: Acting Out Mitosis

In this activity, students use simple props to carry out the process of mitosis.  It takes a little time to get the props ready, but they provide a valuable lesson and help students understand this sometimes "mysterious" process.  All materials can be picked up at a hardware store. 

These mitosis props were based on the instructions found in Chromosome Shuffle.  Please refer to those instructions for more complete information.

You will need to make at least 2 pairs of chromosomes.

For each pair of chromosomes, you'll need two dowels cut to the same length.  Wrap a length of self-adhesive Velcro (the soft side) around the middle of each dowel (or use a hot clue gun to attach regular Velcro).  Slip a length of tubing over the dowel*.  Mark the genes using colored tape (or paint). Screw in the eye half of a hook & eye closure to the middle of the dowel. 

Keep the rough side of the Velcro handy for connecting the chromosomes.

To make the spindles... attach the hook part of the hook & eye closure to the end of a 6 foot length of string.

Two lengths of rope to create the nuclear membranes.  You might also wish to use a larger length of rope to make the cell.  I tend to skip this part - I find the extra rope gets in the way more than it helps.   

Start with a cell with the nuclear membrane in tact.  Paired chromosomes are in the nucleus.

Nuclear membrane is removed.

Chromosomes line up.

Spindles attach to the chromosomes.

Chromosomes are pulled apart, to opposite sides.

Nuclear membranes reform. 

You could also make the corresponding chromosomes to use when studying meiosis. 

*In the orginal instructions, she uses two sizes of tubing - one that goes directly on the dowel, othe other, a larger size that slips over the first tubing.  It is the largest tubing that gets the genes.  This allows you to demonstrate things such as crossing over, etc.  I skipped the larger tubing, because my classes don't go into that kind of detail.  As a result, I could have skipped the tubing altogether and just painted the stripes on the dowels, but I didn't consider that at the time. 

Tuesday, November 9, 2010

Mapping: Make a Topographic Map

Give each group of students a can of Play-Doh.  Have them shape the Play-Doh into a mountain - they can be creative, but simpler is better.

Use a skewer or a straw to poke a hole all the way through the mountain - that's the reference point.

Use a rule to make marks on the side of the mountain every centimeter.

Use dental floss to cut off the bottom slice of the mountain, cutting at the mark you made.

Place the slide on a piece of paper.  Trace around the slice and make a mark where the hole is.

Cut the next slice off the bottom of the mountain.

Place the slide on the paper, lining up the hole in the Play-Doh with the mark on the paper.  Trace around the slice.

Continue in this manner until all the slices have been traced.

You now have a topographic map of your Play-Doh mountain.

Trade maps with another group and see if you can recreate each other's mountains using Play-Doh!

Monday, November 8, 2010

Step Through an Index Card

Here's a challenge to throw at your students: Hand them each an index card and a pair of scissors and tell them to find a way to step through their card (their whole body needs to pass through the card).  [You could use a piece of paper instead of the index card, it's just not quite a dramatic.]

Here's how it's done...
(Well, one way it can be done.  I wouldn't be surprised if your students came up with another). 

Fold the card in half, length-wise.

Make cuts, as shown below.

Unfold the card and cut along the fold.  BUT, do not cut the two end sections!!

Gently pull the card apart and you'll have a loop you can step/pass through.