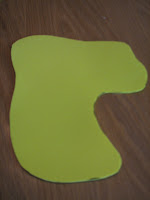
Create a 3D model from a 2D map!
You’ll need:
A simple contour map – 2 copies (you can draw one yourself if you can’t easily find a suitable one)
Fun foam*
Scissors
Glue
Procedure:
1. Set aside one copy of the map to use as a reference.
2. On your “cutting map”, cut along the outer-most contour line. Trace around this piece on a piece of foam. Cut out this piece of foam.
3. On your “cutting map”, cut along the next contour line. Trace around this piece on a piece of foam and cut it out. Use your “reference map” to place it in the appropriate place on the bottom layer. Glue it in place.
4. Continue the process of cutting, tracing, cutting, positioning and glueing until you have completed all the contour lines on your map.
*You could also use corrugated cardboard or styrofoam. Fun foam is great because it’s very easy to cut with regular scissors (not the case with cardboard, you’re likely to need something a bit more powerful).
Tuesday, June 15, 2010
Subscribe to:
Post Comments (Atom)


Hi, Im in 6th grade and I would like several other examples. You see, we are doing a science project EXACTLY LIKE THIS. You could do something like a "turtle shaped" 3D form of a topographic map. I could really use something other than this. Oh and please be sure to include a upstream coming down! Thankyou so much, and I love your work! ;)
ReplyDeleteHello! Thanks for this excellent project (I found it on pinterest!) I used this as inspiration and showed the pictures to my class to help with their own similar project. Here are our results if interested, I've linked back to this page too.
ReplyDeletehttp://bricksandwood.blogspot.co.uk/2015/04/colourful-mountain-contour-maps.html