Wednesday, February 16, 2011

Body Systems: Digestive System: Kinesthetic Model

 I love, love, love this activity from Bobbin Cave, part of the Access Excellence Fellows Collection.
Your students will actually act out the process of digestion - the props are so great and it's so much fun. 
First you'll need to make your food particle:
Place several M&Ms (or other brightly colored candy) in several small plastic bags (zip-top are preferable).

The bags of candy get placed in brown paper bags along with wadded up newspaper.

The paper bags, along with additional wadded up newspaper are placed in a large, thin plastic bag (you want something that rips open easily.
You'll need to gather some additional supplies:
--Large sponges
--Spray bottles filled with water - label half as "Saliva" and half as "Pancreatic Juices"
--Trash can

Use masking tape to make two parallel lines on the floor, 3 or 4 feet apart.

Have students line up, half on each line, facing each other. 

The path between them is the digestive tract.  They will all work together, using peristalsis, to push the food particle down the tract, as well as doing their individual jobs. 

Assign each student a job, based on his/her position along the tract. 
The first two students (the first student in each line) are molars.  Then saliva, pancreas, small intestine, blood, large intestine, and rectum. 
Double up on jobs as necessary to provide everyone with a role.  Explain what each student is responsible for doing in this activity:
  • Molars: rip up food; the students will rip open the plastic bag when the get it
  • Saliva: begins chemical digestion of food: the students will spray the bags and newspapers with their bottle
  • Pancreas: continues chemical digestion of food; the students will spray the bags and newspapers with their bottles
  • Small intestine: absorbs the nutrients and passes them to the blood; the students will search through the food particle to find the nutrients and hand the bags of nutrients to the blood
  • Blood: distributes nutrients throughout the body; the students will pass out the nutrients to all the students (save this to do after all the digesting is complete)
  • Large intestine: absorbs excess water; the students will use the sponges to soak up the water on the floor
  • Rectum: removes waste: the students will place the remains of the food particle in the trash can
 I truly think this is a fantastic activity and is so useful in helping students learn the roles of the organs in the digestive system.  It takes a little bit of prep work (but not too bad) and if done properly, it cleans itself up! 

Tuesday, February 15, 2011

A Call for Ideas

I'm working on a series of posts relating books and science activities for coming weeks and months.

While I've been gathering titles for a while now, I'd love to get your input to extend my list.

I'm largely looking for titles of good quality picture books that have some theme or aspect that could be tied into a science lesson.  (For this project, I'm not looking for books that are overt in their science message, for example the Magic School Bus books.)

Please send me your titles, either as a comment on this post, or you can email adventures{dot}in{dot}science{at}gmail{dot}com with your thoughts.

If you have a science lesson in mind to go with the book, feel free to include that (if you're willing).

If you don't have a precise lesson in mind, but have a general idea of what could be done with your title, feel free to include that.

If you don't have any idea of what could be done with your book but just have a general feeling that the book lends itself to the possibility of a science lesson, pass it along.  I'm happy to try to match up books with activities.

At this point, I'm largely focused on picture books, but if you have some young adult novels in mind, you're welcome to pass them along and I'll work my way through them as well. 

I'm looking forward to hearing your suggestions and encountering some new books!

Spiced Up

Here's a way to create a visual reminder of what soap does to water's surface tension.

Fill a shallow pan with water. 

Sprinkle the water's surface with a variety of herbs and spices (don't use anything with salt).

Cut a piece of paper to fit in the pan.  Lay the paper on the water's surface.

Pick up the paper and lay flat to dry.

Now, sprinkle the water's surface with herbs and spices once again.

Cut another piece of paper to fit in the pan.  Before you lay the paper on the water, add a squirt of dish detergent to the water. 

Lay the paper on the water.  Pick it up and lay flat to dry.

What differences do you notice between the two trials?  Why did the soap cause such a difference?

The soap reduces water's surface tension.  The herbs and spices, which are normally held on top of the water by the surface tension, now fall into the water.  As a result, the paper, which only touches the surface of the water, doesn't collect very much.

Monday, February 14, 2011

Body Systems: Cardiovascular System: Heart Diagram Roundup

All last week I shared some heart themed science activities.  In case you missed them, they were:
Beat Your Heart
Race Your Heart
Heart Squeeze
Heart Mambo
Heart Mold

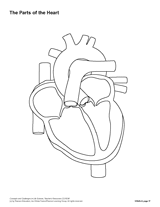
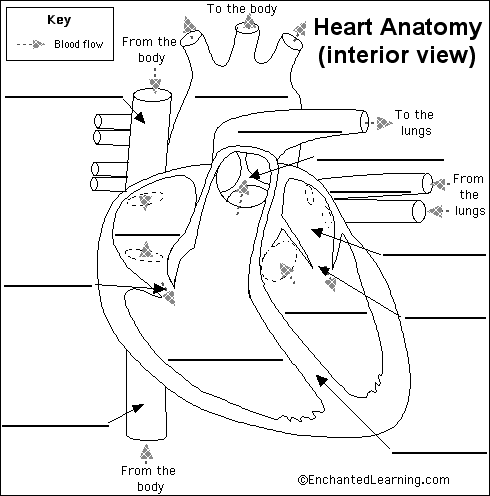
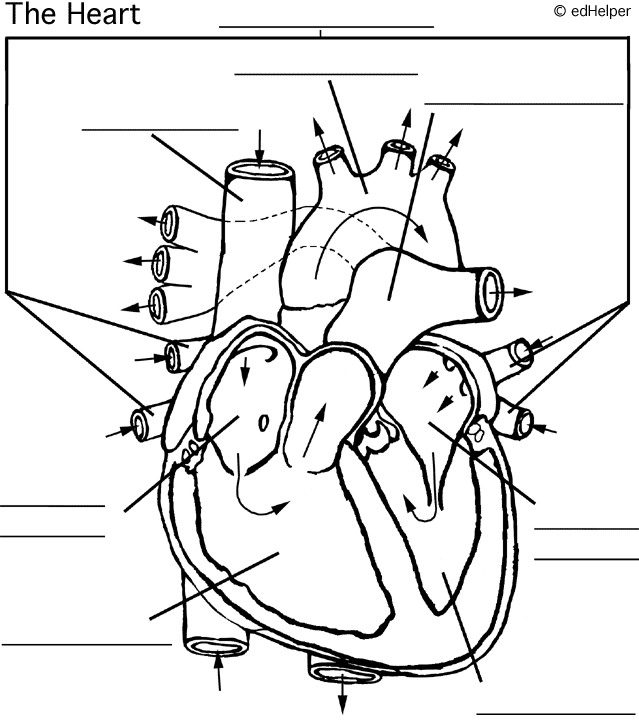
And for today, I'll leave you with some printable heart diagrams.  Happy Valentine's Day!

You can find a plethora of heart diagrams on the Internet.  Here are several different ones - some with spots to label, some plain, and some in color.  To get the full-size image, click on the word link. 

From TeacherVision:


The Science Museum of Minnesota: (they also have some interesting animations here)


From edHelper (with labels here):


From Wikipedia:

Friday, February 11, 2011

Body Systems: Cardiovascular System: Heart Mold

It's probably too late to use this idea for this year, but it's always okay to start planning for next year. 

Educational Innovations (more on them coming up in the near future) makes this heart mold to be used in constructing a gelatin heart.  It includes instructions for making a hear the same size, shape, mass and color as an adult human heart. 

A little disturbing, a lot cool!


PS If you like this sort of thing, they also make a brain mold...

PPS Amazon sells a similar heart mold and brain mold.  They are less expensive, but I'm not sure how the size compares and I don't believe they include the instructions for getting the proper mass and color.

Thursday, February 10, 2011

Body Systems: Cardiovascular System: Heart Mambo

You'll need to do a bit of prep work on this one, but it's a great learning tool, especially for your kinesthetic learners.

This activity originally comes from Janet Guadino and was shared at the 2007 Maitland Simmons Life Science Institute.


You'll need to make a series of signs for the floor. Use as many 'parts' as is appropriate for your students.  I've chose not to include the valves, but they are included in the list, parenthetically.

Blue Signs (written in blue or on blue paper)
Right Atrium
Right Ventricle
(Tricuspid A.V. Valve)
(Pulmonary Semilunar Valve)
Pulmonary Trunk Artery
Veins
Veins
Vena Cava
Arrow (x12)

Red Signs (Written in red or on red paper)
Pulmonary Vein
Left Atrium
Left Ventricle
(Aortic Semilunar Valve) 
(Bicuspid/Mitral A.V. Valve)
Aorta
Arteries
Arteries
Arrow (x9)


Red and Blue Signs
Capillaries
Capillaries

Neutral Colored
Lungs

Arrange the cards on the floor as shown below (this is a condensed view, so they'll fit in one picture; you'll obviously want them spread apart so the path can be walked along):


In case you can't make it out from those shadowy pictures, the order of the signs is...

Lungs/Capillaries
Pulmonary Vein
Left Atrium
Left Ventricle
Aorta
Arteries
Capillaries
Veins
Vena Cava
Right Atrium
Right Ventricle
Pulmonary Artery
And back to the lungs


Have the students form a conga line behind you and lead them through the heart.  As you're traveling, chant "We're goin' through the heart, yeah!" Feel free to add some conga motions as well.  Pause at each location and call out where you're at/what you're doing. 

To close out the activity, have students place the following steps in order.  There is no right or wrong step to begin with, as it's a cycle, it's the order in which they appear that matters.  (I've written them in order for you, but you'd obviously mix them up before handing them to your students):

1 - Oxygen poor blood flows from the body into the right atrium

2 - The blood flows from the right atrium to the right ventricle

3 - The right ventricle pumps blood into the arteries that lead to the lungs

4 - In the lungs the blood picks up the oxygen and leaves carbon dioxide

5 - Oxygen rich blood leaves the lungs and enters the left atrium

6 - Blood flows from the left atrium into the left ventricle

7 - oxygen rich blood leaves the left ventricle and enters the aorta

8 - The aorta carries the oxygen rich blood to the rest of the body

Wednesday, February 9, 2011

Body Systems: Cardiovascular System: Heart Squeeze

Get an idea how much force it takes to squeeze blood out of the heart....

The force needed to squeeze a tennis ball is similar to the force needed to squeeze blood out of the heart.

Gather enough tennis balls so you have one ball for every two students (if you can get one for every student, they activity will proceed a bit faster, as you won't have to repeat every step).  Ideally, you'll find someone who plays tennis and can get you as many dead balls as you could want - your phys. ed. teacher might be able to help you find someone.

If you have the time, and feel inspired, you can draw a heart on the balls, but it's by no means necessary.

Ask students to squeeze the ball as many times as they think the heart muscle squeezes in 15 seconds (they need to give the ball a good, solid squeeze).  Their partner can time them, or you (the teacher) can call out the time for the whole class.  Each student should record their squeezes.

Allow the partner students to repeat this step.

Now the students will squeeze the ball each time the teacher counts.  Call out one beat per second.  Go for a full minute if your students can handle it. 

Repeat for the other students.

Gather students feedback about squeezing the ball at the pace.  Their hands will be rather tired.

Now tell them that pace was for a person at rest, but no one stays that still when they are awake.

Go for another full minute, this time calling out beats faster than one per second.  You're aiming for about 80 counts in one minute. 

Repeat for the other students.