You may have seen images of this activity before... I know versions of it have been prevalent on Pinterest. We'll go through the basics and then we'll talk a bit about stepping it up and stretching your kids' brains!
In its basic form, you begin with 3 cups, some water, food coloring and a paper towel.
Fill two of the cups with water and color the water in each cup a different color.
Arrange the cups in a line, with the empty cup between the cups with colored water.
Take a piece of paper towel (I used half a paper towel) and twist the middle a little. Then bend the towel so that it creates a bridge from one cup to another. Repeat with another paper towel to connect the other two cups.
Observe.
The water will move from each of the cups, through the paper towels into the empty cup. You'll know water has moved because there is now water where before there was none and you'll know that it has come from both cups because the center cup will contain green water (the combination of yellow water and blue water).
The movement happens fairly quickly - the process will be complete within a couple of hours.
It may not be terribly obvious, because we tend to start with about equal amounts of water in the two cups with which we start, but the water will keep moving until all three cups have equal amounts of water in them.
At that point, water stops moving and system will basically just sit there. The cups have reached equilibrium. You can let the cups sit there for days and you won't notice much changing.
You can add water by pouring more water into any one of the cups in the system. Or you can add a fourth cup to the system and connect it with a paper towel.
I chose to add another cup of water (uncolored this time) and connect it to the middle (green) cup with a paper towel.
Make sure the cup you add to the system has a different water level than what's in the other cups or you won't get any movement. I was trying to move water into the green cup, so I made sure my new cup was pretty full of water. You could also connect an empty cup to the system via paper towel and watch the water flow in the other direction.
The system that had been sitting dormant for several days sprang into action.
Colorless water flowed into the green cup (as evidenced by the lightening of the green color). Green water then flowed into the blue and yellow cups (as evidenced by the color change in those cups).
A really simple experiment with a lot of permeations - you can keep playing with it day after day, adding water or empty cups at different spots in the system. Really great for inquiry learning and exploring!
Showing posts with label Water. Show all posts
Wednesday, July 3, 2013
Tuesday, November 29, 2011
Oceans: Increasing Pressure with Depth
Students don't always understand that the deeper you go under water, the greater the pressure. This immense pressure is one of the reasons why so much of the ocean floor is still unexplored.
Try out this demonstration to help your students visualize the pressure increasing as they travel deeper.
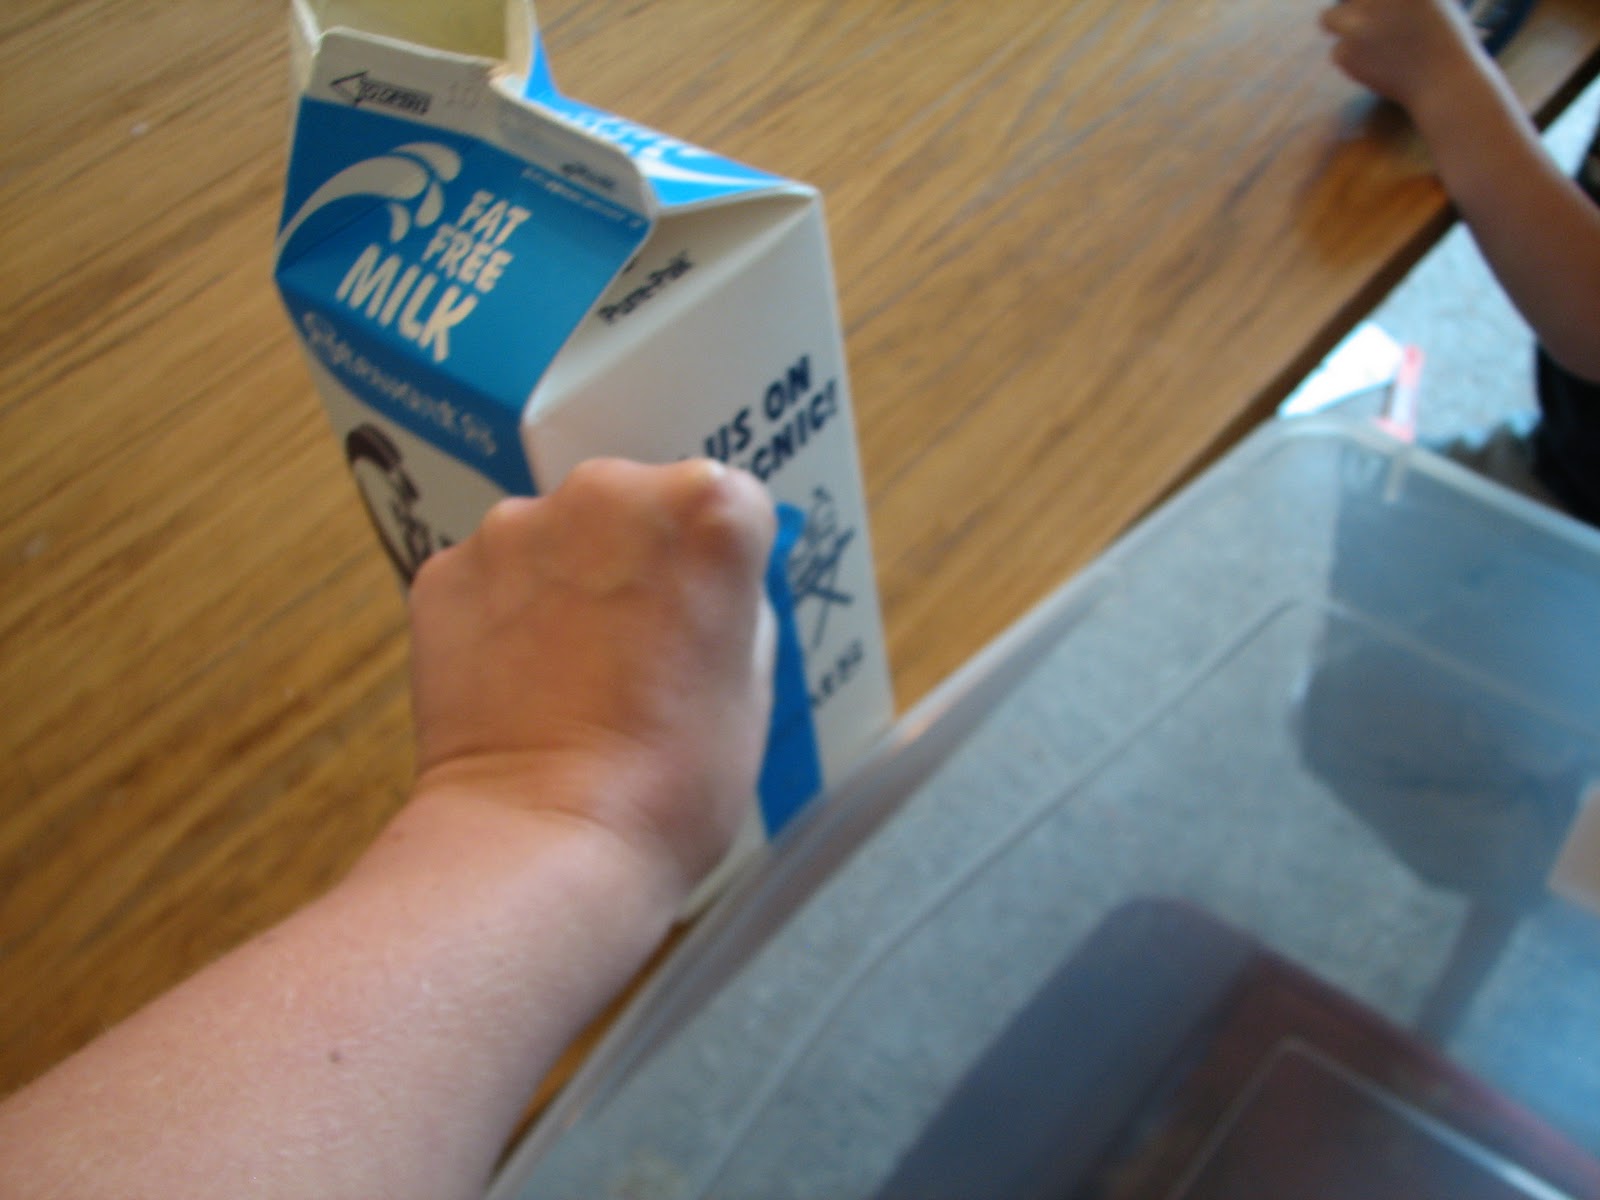
Begin with an empty carton from a half-gallon of milk or OJ. (A bottle would work too, but it's much more difficult to make the holes).
You'll also need some masking tape, a large tub in which to collect water and a poking device - I found a skewer worked well for me.
Lay the carton on its side on the table and make a hole near the bottom of the carton.
Make a second hole 1 - 2" above the first hole and a third hole 1 - 2" above the second hole.
Run a strip of masking tape down the carton, covering all three holes.
Fill the carton with water and set it on the table, with a tub to catch the water when it spills out of the holes.
When you're ready, remove the tape and observe the water flowing out of each hole.
The water coming out of the bottom hole is under the greatest pressure (it has the most water/weight on top of it) and it is pushed out of the carton with much greater force - look how far it shoots out.
The water coming out of the top hole is under little pressure (there's not much pushing on it), so it sort of dribbles out.
Try out this demonstration to help your students visualize the pressure increasing as they travel deeper.
Begin with an empty carton from a half-gallon of milk or OJ. (A bottle would work too, but it's much more difficult to make the holes).
Lay the carton on its side on the table and make a hole near the bottom of the carton.
Make a second hole 1 - 2" above the first hole and a third hole 1 - 2" above the second hole.
Fill the carton with water and set it on the table, with a tub to catch the water when it spills out of the holes.
When you're ready, remove the tape and observe the water flowing out of each hole.
The water coming out of the top hole is under little pressure (there's not much pushing on it), so it sort of dribbles out.
Tuesday, November 1, 2011
Erosion: A Flowing River
This is a good one to do outside, if you can swing it. If not, it can be done inside, you'll just need to work harder to contain the water.
Materials:
--Paper cup
--Drinking straw--Clay
-- Cookie sheet
--Loose soil or sand
--Jug filled with water (or other water source)
Prep Work:
Poke a hole in the side of the paper cup, near the bottom.
Cut the straw in half and place one half in the hole.
Seal the hole, around the straw, with the clay.
For the Demonstration:
Lay the cookie sheet upside down on the ground and raise one end about 2 inches, using scrap wood, a brick, a pile of soil, whatever's convenient.
Cover the cookie sheet with a thin layer of soil or sand. Place the cup at the raised end of the cookie sheet.
Hold your finger over the straw as you fill the cup with water. Remove your finger and watch the way path of the water.
Raise the end of the cookie sheet to about 6 inches, recover the sheet with soil and repeat.
What differences did the slope make in the erosion?
Cover the cookie sheet with a layer of soil again. This time, place a small rock in the soil in front of the straw.
Fill the cup and watch what happens to the water as it encounters the rock. You can place additional rocks along the way to change the direction of the river.
Tuesday, October 4, 2011
Sand Collection
It's very simple to start a sand collection - every time you visit a beach or other sandy location, collect a small sample in a zip-top bag. Ask your students to do the same on their travels, as well as colleagues and family members. It won't take long and you'll have a variety of sand samples to compare and contrast.
You can keep your samples in clear plastic bags and use a magnifying glass to observe, or if you've got the resources, you could store the samples in magnifier boxes.
The diversity of the samples will provide a variety of discussion points. What is the sand made of? Why is the sand the color that it is? How large the grains of sand? Why?
For instance, the above sample was photographed (because one should never remove anything from a national park) at Acadia National Park. You immediately notice, with the naked eye, that the sand is very coarse. You'll notice that many of the pieces of sand look like crushed shells - for good reason, that's exactly what they are! You'll also notice lots of different colors in the sand.
I'm particularly fond of the blues, purples and greens. The blue and purple pieces are crushed mussel shells. The green "spikes" are bristles from a sea urchin.
Along the same lines, retired science teacher Charles Lindgren has created the Science of Sand website. He has solicited sand samples from across the country and world and photographed the sand at a 9X magnification.
His samples are organized by state and country, and you're welcome to use the images for a virtual sand lab. In fact, he's also included some lesson ideas.
He's also always looking for new samples, so if you live or travel near sand, consider collecting a sample for him.
And take a look at his site - the pictures are gorgeous, much better than mine!
Tuesday, September 27, 2011
Water Cycle: The Incredible Journey
This is adapted from the ProjectWET curriculum guide. I've seen this adaptation in several different locations, so I don't know whom to officially credit. Regardless, it's a great activity and I hope you and your students enjoy it!
If I ask you to describe the water cycle, what comes to mind?
I'll bet your picturing the image from your textbook: the clouds raining over the mountain, the water moving down the mountain into the ocean/lake, the water evaporating from the ocean/lake to form clouds. Maybe there's a tree in there somewhere, releasing water into the air as well. You know... this one....
That's the easiest way to explain the water cycle, right?
But, you're all smart people; you realize the water cycle is more than a simple circle. There are any number of different paths that water can take.
How do you get your students to understand that?
The ProjectWET folks created The Incredible Journey, in which students travel between 9 different stations: clouds, oceans, rivers, lakes, plants, animals, soil, glaciers and ground water.
Each station is set up with an identifying sign (it could just be a large sign with the word on it, it could be a painting representing that station, or it could a collage of pictures representing that area), a large die (see instructions below) and a tub of pony beads (one color per station).
Each student begins with a pipe cleaner (loop over one end so the beads don't slide off) at a station of their choosing.
The student picks up bead from that station and slides it onto the pipe cleaner.
The student then roles the die and travels to the station the die directed them to. At the new station, the student picks up a bead and adds it to the pipe cleaner and roles the die.
If the student roles a "Stay" he or she remains at the same station, picking up another bead representing that station and roles the die again. It is possible to remain at the same station for a number of roles, which would be represented by several of the same color beads in a row.
After the students have had the chance to visit ~24 stations, bring the group back together and talk about what happened. Use the strings of beads to question the students about where they began, where they went next, etc. Ask the students how they would have gotten from one place to another.
For instance, my journey began as a drop of water in an animal. From there I traveled to the ground. How would I have gone from being in an animal to the ground? Well, the animal probably urinated; other answers could include slobber/drool, sweat, etc.
How would I have gone from the clouds to the ocean? Rain (or another form of precipitation).
A nice way to close the activity is to have students write about their journey - a first-person narrative of their travels and how they moved from one location to another.
The Dice:
SOIL:
Plant
River
Ground water
Clouds x2
Stay
PLANT:
Clouds x4
Stay x2
RIVER:
Lake
Ground Water
Ocean
Animal
Clouds
Stay
CLOUDS:
Soil
Glacier
Lake
Ocean x2
Stay
OCEAN:
Clouds x2
Stay x4
LAKE:
Ground Water
Animal
River
Clouds
Stay x2
ANIMAL:
Soil x2
Clouds x3
Stay
GROUND WATER:
River
Lake x2
Stay x3
GLACIER:
Ground Water
Clouds
River
Stay x3
If I ask you to describe the water cycle, what comes to mind?
I'll bet your picturing the image from your textbook: the clouds raining over the mountain, the water moving down the mountain into the ocean/lake, the water evaporating from the ocean/lake to form clouds. Maybe there's a tree in there somewhere, releasing water into the air as well. You know... this one....
That's the easiest way to explain the water cycle, right?
But, you're all smart people; you realize the water cycle is more than a simple circle. There are any number of different paths that water can take.
How do you get your students to understand that?
The ProjectWET folks created The Incredible Journey, in which students travel between 9 different stations: clouds, oceans, rivers, lakes, plants, animals, soil, glaciers and ground water.
Each station is set up with an identifying sign (it could just be a large sign with the word on it, it could be a painting representing that station, or it could a collage of pictures representing that area), a large die (see instructions below) and a tub of pony beads (one color per station).
The original version of the activity has students write down where they travel, but to make things more fun and memorable, the adaptation has students use the beads to create a keychain/bracelet to document their travels as a water drop.
The student picks up bead from that station and slides it onto the pipe cleaner.
The student then roles the die and travels to the station the die directed them to. At the new station, the student picks up a bead and adds it to the pipe cleaner and roles the die.
If the student roles a "Stay" he or she remains at the same station, picking up another bead representing that station and roles the die again. It is possible to remain at the same station for a number of roles, which would be represented by several of the same color beads in a row.
After the students have had the chance to visit ~24 stations, bring the group back together and talk about what happened. Use the strings of beads to question the students about where they began, where they went next, etc. Ask the students how they would have gotten from one place to another.
How would I have gone from the clouds to the ocean? Rain (or another form of precipitation).
A nice way to close the activity is to have students write about their journey - a first-person narrative of their travels and how they moved from one location to another.
The Dice:
Use square boxes to make the dice, label the sides (see below), and cover with packing tape (just to make them last longer).
OR
Cover wooden blocks with masking tape and label the sides (see below).
For each station, label the sides as follows (make sure you mark your dice as to which station each belongs to):
SOIL:
Plant
River
Ground water
Clouds x2
Stay
PLANT:
Clouds x4
Stay x2
RIVER:
Lake
Ground Water
Ocean
Animal
Clouds
Stay
CLOUDS:
Soil
Glacier
Lake
Ocean x2
Stay
OCEAN:
Clouds x2
Stay x4
LAKE:
Ground Water
Animal
River
Clouds
Stay x2
ANIMAL:
Soil x2
Clouds x3
Stay
GROUND WATER:
River
Lake x2
Stay x3
GLACIER:
Ground Water
Clouds
River
Stay x3
Tuesday, September 13, 2011
Which Way Does a River Flow?
Downhill, of course!
But, in every classroom there are students convinced that all rivers flow south. Blame it on wall maps that hang vertically and our knowledge of gravity. Blame it on the directionality of our largest river. Blame it on ignorance. But then do something to correct the misconception.
-Water-based markers: Blue, Brown, Purple, Black
-Spray Bottle filled with water
To begin, each group will create a unique landscape by crumpling up the piece of freezer paper. The paper is then opened part-way to reveal mountains, valleys, crevices, etc.
Place the paper in the pan, making sure all of the paper is contained in the pan.
Use the brown marker to mark the ridges and high points of the landscape.
Use the blue marker to mark the low spots, where the students think the water will collect.
Students then need to decide where they think the best place to build roads would be. They then draw in the roads using the black marker.
Each student should choose a site for a house and draw that in with the purple marker. They may also wish to draw in other municipal buildings.
Finally, add a compass rose to the upper right hand corner.
Now you're ready for it to rain....
Using the spray bottle, mist water all over the landscape and watch what happens to the water - where it flows, where it collects, etc.
How did the roads fare? How about the houses?
Did all the water flow in the same direction? Which way did it go?
But, in every classroom there are students convinced that all rivers flow south. Blame it on wall maps that hang vertically and our knowledge of gravity. Blame it on the directionality of our largest river. Blame it on ignorance. But then do something to correct the misconception.
Each group will need:
-A sheet of freezer paper
-A pan or tub in which the paper fits-Water-based markers: Blue, Brown, Purple, Black
-Spray Bottle filled with water
To begin, each group will create a unique landscape by crumpling up the piece of freezer paper. The paper is then opened part-way to reveal mountains, valleys, crevices, etc.
Place the paper in the pan, making sure all of the paper is contained in the pan.
Use the brown marker to mark the ridges and high points of the landscape.
Use the blue marker to mark the low spots, where the students think the water will collect.
Students then need to decide where they think the best place to build roads would be. They then draw in the roads using the black marker.
Each student should choose a site for a house and draw that in with the purple marker. They may also wish to draw in other municipal buildings.
Finally, add a compass rose to the upper right hand corner.
Now you're ready for it to rain....
Using the spray bottle, mist water all over the landscape and watch what happens to the water - where it flows, where it collects, etc.
How did the roads fare? How about the houses?
Did all the water flow in the same direction? Which way did it go?
Tuesday, July 26, 2011
Summer Science Camp: Water Fest
On a particularly hot day, move science camp outside for a day-long Water Fest. Make sure to let students know they should dress appropriately for a water-filled day.
You might want to begin with some learning...
...about properties of water
But It's Full
Baby Powder Snowstorm
A Hole in the Water
Boat Races
Bending Water
Capillary Action in Action
Balancing Act
Mystery Jars
Drops on a Penny
Penny Boats
...about the water we have on Earth
Who Dirtied the Water
Earth's Water Necklace
Earth Ball Catch
And, since it is summer, make sure you include some fun water games - sponge tosses, relay races, water balloon catch, drip-drip-splash (a.k.a. duck-duck-goose, with a wet twist!). I found a great list of water games (including various versions of the games I just mentioned), with the rules, for camp here. I'm thinking I want to try the T-shirt Freeze. I would be especially great if you've made the Sharpie t-shirts (or some other shirt) during camp and still have those in your possession - what a fun way to distribute the shirts to the students!
You might want to begin with some learning...
...about properties of water
But It's Full
Baby Powder Snowstorm
A Hole in the Water
Boat Races
Bending Water
Capillary Action in Action
Balancing Act
Mystery Jars
Drops on a Penny
Penny Boats
...about the water we have on Earth
Who Dirtied the Water
Earth's Water Necklace
Earth Ball Catch
And, since it is summer, make sure you include some fun water games - sponge tosses, relay races, water balloon catch, drip-drip-splash (a.k.a. duck-duck-goose, with a wet twist!). I found a great list of water games (including various versions of the games I just mentioned), with the rules, for camp here. I'm thinking I want to try the T-shirt Freeze. I would be especially great if you've made the Sharpie t-shirts (or some other shirt) during camp and still have those in your possession - what a fun way to distribute the shirts to the students!
Tuesday, February 15, 2011
Spiced Up
Here's a way to create a visual reminder of what soap does to water's surface tension.
Fill a shallow pan with water.
Cut a piece of paper to fit in the pan. Lay the paper on the water's surface.
Pick up the paper and lay flat to dry.
Now, sprinkle the water's surface with herbs and spices once again.
Cut another piece of paper to fit in the pan. Before you lay the paper on the water, add a squirt of dish detergent to the water.
Lay the paper on the water. Pick it up and lay flat to dry.
What differences do you notice between the two trials? Why did the soap cause such a difference?
The soap reduces water's surface tension. The herbs and spices, which are normally held on top of the water by the surface tension, now fall into the water. As a result, the paper, which only touches the surface of the water, doesn't collect very much.
Friday, January 28, 2011
But It's Full...
Fill a cup with water. All the way. So you can't put another drop in the cup without some spilling out.
How many pennies do you think you can add to the cup before water will spill out?
One? Maybe two?
Give it a try....
Once again, we see evidence of water sticking to itself (cohesion) to form a strong surface.
Try again with a drop of soap mixed in with your water...
How many pennies do you think you can add to the cup before water will spill out?
One? Maybe two?
Give it a try....
Once again, we see evidence of water sticking to itself (cohesion) to form a strong surface.
Try again with a drop of soap mixed in with your water...
Monday, January 17, 2011
Mixing Colors
Using the same technique used when learning to use a pipette, students can investigate mixing colors in a very simple, non-messy way.
Provide students with a pipette, wax paper, paper towel and 3 small cups - one with blue water, one with red water and one with yellow water. Food coloring can be used to color the water (a small amount will go a long way), but food coloring does have the potential to stain, should the water spill. Another option is to use the True Color Tablets available from Steve Spangler Science, which do not stain.
Students use the pipette to place drops of colored water on the wax paper. They can then drag the different colored drops together and watch the colors mix.
Challenge your students to make the entire color wheel. Or see how many different shades of green they can create by mixing varying amounts of blue and yellow water. Most importantly, allow them time to explore on their own to see what they can learn.
Provide students with a pipette, wax paper, paper towel and 3 small cups - one with blue water, one with red water and one with yellow water. Food coloring can be used to color the water (a small amount will go a long way), but food coloring does have the potential to stain, should the water spill. Another option is to use the True Color Tablets available from Steve Spangler Science, which do not stain.
Students use the pipette to place drops of colored water on the wax paper. They can then drag the different colored drops together and watch the colors mix.
Challenge your students to make the entire color wheel. Or see how many different shades of green they can create by mixing varying amounts of blue and yellow water. Most importantly, allow them time to explore on their own to see what they can learn.
Friday, January 14, 2011
Water: Baby Powder Snowstorm
Fill a class container part way with water.
Sprinkle some baby powder on top of the water. It will just stay on the top. In fact, you could try to mix it in, and it would still just want to stay at the top. The surface tension of water is such that it just holds those small baby powder particles on the top.
Now place a drop of dish detergent (or other soap) into the water....
Snowstorm!!
Soap breaks the surface tension of water (which is what makes it useful for cleaning) allowing the baby powder to fall through the water. It's interesting to watch - the powder will just fall through the hole made by the soap - the rest of it will continue to sit on top of the water.
Sprinkle some baby powder on top of the water. It will just stay on the top. In fact, you could try to mix it in, and it would still just want to stay at the top. The surface tension of water is such that it just holds those small baby powder particles on the top.
Now place a drop of dish detergent (or other soap) into the water....
Snowstorm!!
Soap breaks the surface tension of water (which is what makes it useful for cleaning) allowing the baby powder to fall through the water. It's interesting to watch - the powder will just fall through the hole made by the soap - the rest of it will continue to sit on top of the water.
Friday, December 31, 2010
A Hole in the Water
This is a very cool demonstration! Make sure you only use a spoonful or two of water - I tried to do this repeatedly, but with too much water, and was getting very frustrated by the lack of results. When I broke down and followed the directions, it worked beautifully. I had to do it 3 times in a row just to marvel at it!
Place a spoonful of water onto a plate. Add a drop of food coloring and swirl to mix.
When the water has settled, add a few drops of rubbing alcohol to the center of the water.
Watch the water pull away from the alcohol - the alcohol has less surface tension than the water. The water molecules want to stick together (literally), so they pull away from the alcohol, leaving a hole in the middle.
Watch the edge of the water. It literally quivers as it tries to stick together. So cool!
Place a spoonful of water onto a plate. Add a drop of food coloring and swirl to mix.
When the water has settled, add a few drops of rubbing alcohol to the center of the water.
Watch the water pull away from the alcohol - the alcohol has less surface tension than the water. The water molecules want to stick together (literally), so they pull away from the alcohol, leaving a hole in the middle.
Watch the edge of the water. It literally quivers as it tries to stick together. So cool!
Subscribe to:
Posts (Atom)