Showing posts with label How Does That Work?. Show all posts

Friday, March 18, 2011

How Does That Work?: Gravity Defying Belt

 Can you balance a belt off the end of your finger?

How about off the edge of a table?

This is a lesson in an object's center of gravity.  When placed on a hook similar to this:
 a stiff belt (make sure it's stiff, a floppy belt or rope won't work) will curve under, so its center or gravity is directly below the point where the hook meets your finger (or the table), causing it to balance. 

Here's another picture of a hook - it doesn't have to be exactly the same shape as above.  And here's one that doesn't even look like a hook, but it still works.


Friday, November 19, 2010

How Does That Work: Magic Marble

A "marble" that hovers right in the middle of the cup.  Can your students explain it? 
{It's all about density and immiscibility}

Fill a cup between 1/3 and 1/2 full of water.  Add a drop of two of food coloring.

Use a dropper to place a couple of blobs of cooking oil on the water.

Tilt the cup and pour in rubbing alcohol.  (You want to pour the alcohol down the side of the cup, so you don't mix the water and alcohol and also so you don't disturb your oil blobs).

Add a drop or two of food coloring to the top of the cup, if needed.

[If you wish for something a bit more permanent, create your magic marble in a jar and cover with the lid.  


To keep your "marble" hovering in the liquid, don't shake or disturb the cup.  If you're curious what happens if the alcohol and water are mixed, make a hypothesis and have at it!


*****************
How Does That Work is a series of products and demonstrations that you can present to your students and challenge them to explain the science of how they work. Make sure you decide ahead of time what you'll accept as a valid explanation - can it be printed straight off the internet, written in the student's own words, or does the student need to be able to explain it to you conversationally? What will a valid explanation earn the student - a prize, extra credit, a feeling of goodness?

Friday, September 10, 2010

How Does That Work: Doing the Back Float

This is a simple activity, but its explanatin is a bit sophisticated.  Therefore it's a good candidate for older and/or more advanced students.  But, don't let that stop you from trying it with younger students - keep your explanations basic and you might be surprised at what they take away from it.

What you'll need:
Baby oil
Water
Water bottle
Index card
Sharpened pencil
Hole punch

What to do:
Prepare a bottle, filled about half way with water and the remaining way with baby oil. 

On one side of an index card, color with a pencil, getting as much graphite as you can onto the index card.

Use a hole punch to punch the index card.

Place the hole punches into the bottle of oil and water.


What you'll see:
The dark side of the holes will always face the oil and not the water.  You can shake it up and they'll always return to that position.

Why:
Graphite is a good conductor, which gives it a negative polarity.  Water also has polarity, and it repels the graphite, so the graphite side will face the oil.


You can also talk about things like density, immiscibility and the like with this activity.

*****************
How Does That Work is a series of products and demonstrations that you can present to your students and challenge them to explain the science of how they work. Make sure you decide ahead of time what you'll accept as a valid explanation - can it be printed straight off the internet, written in the student's own words, or does the student need to be able to explain it to you conversationally? What will a valid explanation earn the student - a prize, extra credit, a feeling of goodness?

Friday, August 6, 2010

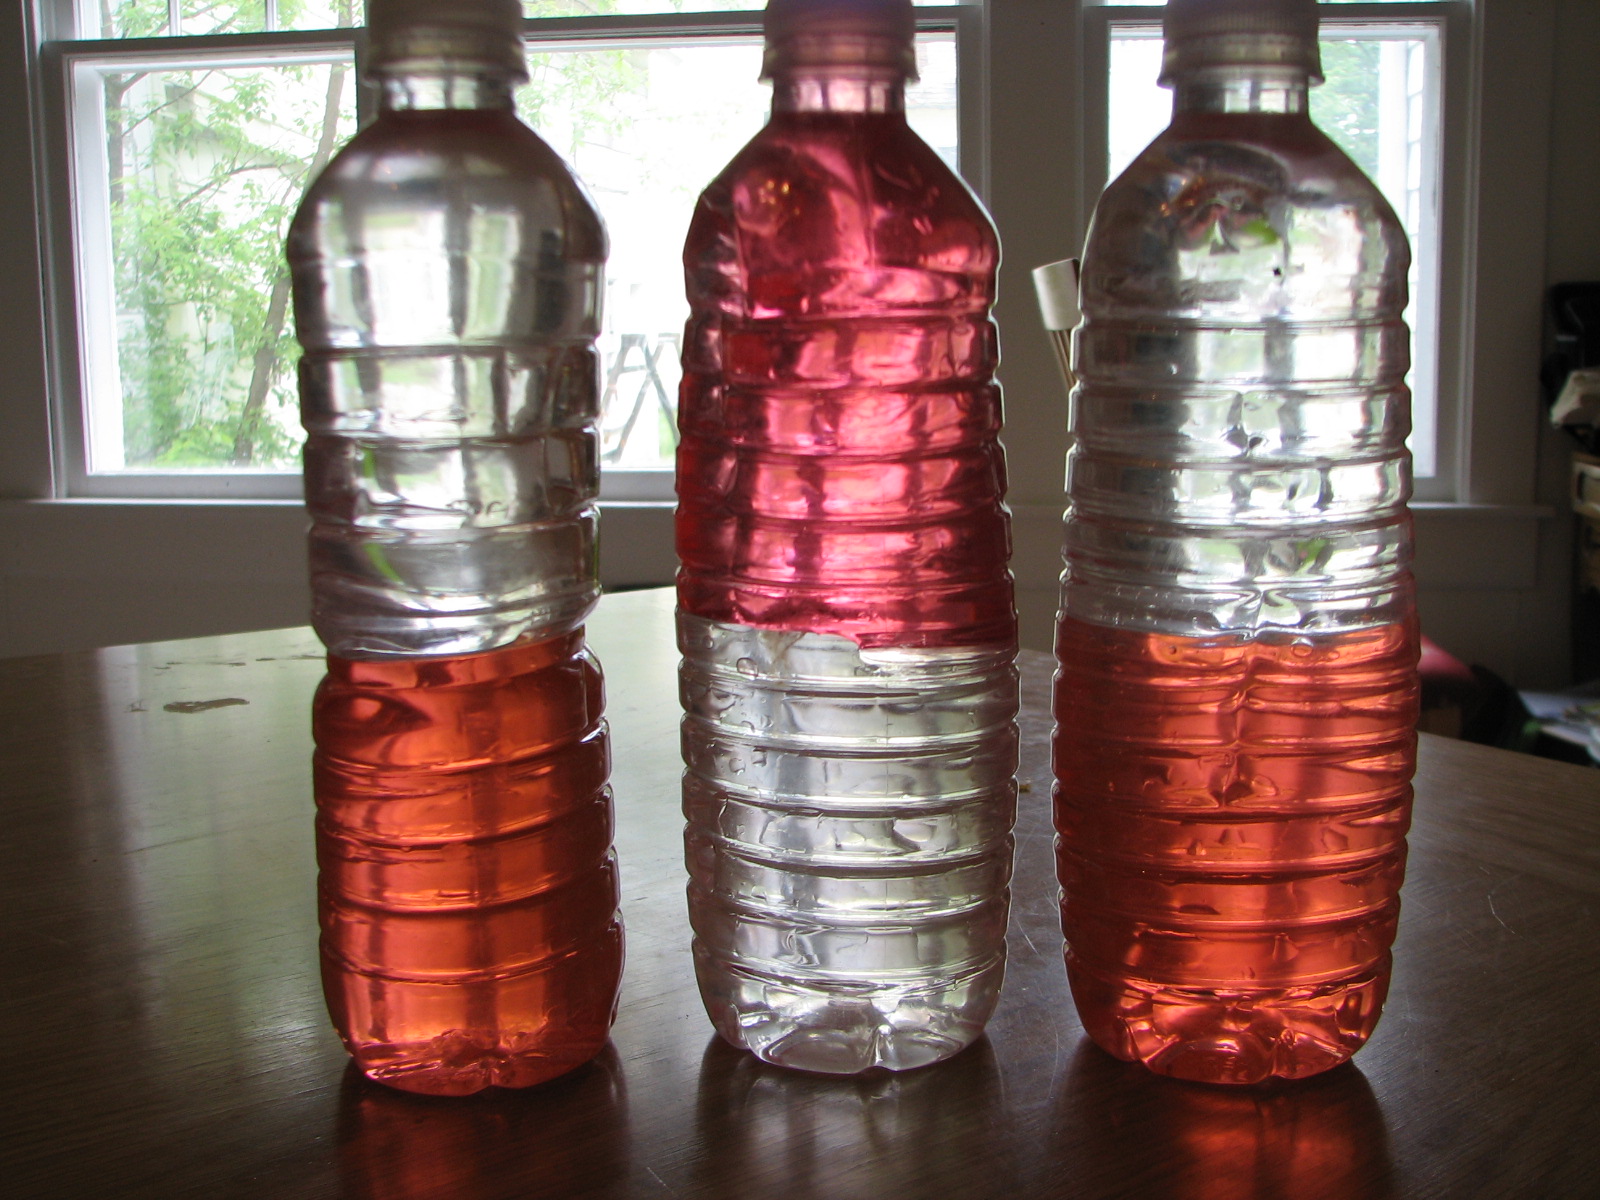
How Does That Work: Frustration Bottles


There are so many things you can talk about with this demonstration: solubility, density, immiscibility, etc.  It also makes a good How Does That Work demonstration. 

In short:
You have three bottles, each made of two layers, but in one bottle the layers are reversed.  The bottles are filled with water (on the bottom) and baby oil (on the top).  In two of the bottles, the water is colored with water soluble food dye (which will color water but not oil).  In the third bottle, the oil is colored with liquid candle dye (which will color oil, but not water).

In long:
You'll need:
3 (500mL) water bottles
750 mL baby oil
750 mL water
food coloring

Fill 2 of the bottles with 250 mL of water.  Fill the remaining bottle with 250 mL of baby oil.

Use the candle dye to color the baby oil (do this before coloring the water - the water and food coloring are much more forgiving and easier to dispose of should you need to start over).

Use the food coloring to color the water, attempting to match the oil color as best you can.  Keep track of what you used and repeat with the second water bottle.

Into the bottle with the oil, add 250 mL of water.

Into the two bottles with water, add 250 mL of baby oil to each.  Cap.  (You may wish to run some glue along the cap so they are more resistant to being opened).

Leave the bottles on your front table/desk and let the students explore.  They'll try to turn the "wrong" one upside down.  They may try to shake them and then watch them separate.

Should lead to some good discussions!

You can keep these forever - put them in a safe spot until you need them the next time!

*****************
How Does That Work is a series of products and demonstrations that you can present to your students and challenge them to explain the science of how they work. Make sure you decide ahead of time what you'll accept as a valid explanation - can it be printed straight off the internet, written in the student's own words, or does the student need to be able to explain it to you conversationally? What will a valid explanation earn the student - a prize, extra credit, a feeling of goodness?

Friday, July 2, 2010

How Does That Work?: The Drinking Bird

DRINKING BIRD

Have you ever seen these little toys around?  You dip their beak in a cup of water, then the bird swings up and when he gets thirsty again, he'll dunk down and get some more to drink.  He'll do this over and over again. 

Can your students figure out why? 

The short answer has to do with evaporative cooling and vapor pressure.  For a longer answer, check here.

******
How Does That Work is a series of products and demonstrations that you can present to your students and challenge them to explain the science of how they work. Make sure you decide ahead of time what you'll accept as a valid explanation - can it be printed straight off the internet, written in the student's own words, or does the student need to be able to explain it to you conversationally? What will a valid explanation earn the student - a prize, extra credit, a feeling of goodness?  

Friday, June 4, 2010

How Does that Work: Is All Plastic the Same?

Go through your recycling and pull out several different plastic containers. Cut up the different types and place each in water.

What happens?


Sorry - the PET disappears in the water, but it's there, on the bottom.

PET plastics (soda bottles, #2) will sink. HDPE plastics (milk jugs, #1) will float.

There are lots of different directions you can go from here:
-What do PET and HDPE stand for?
-What are they each made of?
-Why does milk get packaged in HDPE but soda and water in PET?
-Is the recycling process different for the different types of plastics?
-Is one type of plastic more environmentally sound than another?

I'll admit, I don't entirely understand the differences, but that doesn't stop me from sharing things with my students.  It's a great opportunity for us to learn together. 

Friday, April 9, 2010

How Does That Work? Wine Rack


The wine bottle appears to defy gravity in this wonderful gadget. I've been told you can find all variety of these in wine stores, online, etc. Or you can make your own (or have your dad make you one in celebration of your college graduation :) There are instructions throughout the internet, but basically, you take a slab of wood (mine measures about 9" long by 3 or 4" wide, cut a hole in one end,

and trim the edges so they are at 45 degree angles.

In a classroom setting, you'd obviously want to use some sparkling juice instead of wine. I believe that if you make the hole big enough, you could also use a 2L bottle of soda. I wasn't able to test it out - mine isn't large enough to accomodate such a large bottle.

The bottle holder works based on the principle of center of gravity - can your students figure it out?

*****************
How Does That Work is a series of products and demonstrations that you can present to your students and challenge them to explain the science of how they work. Make sure you decide ahead of time what you'll accept as a valid explanation - can it be printed straight off the internet, written in the student's own words, or does the student need to be able to explain it to you conversationally? What will a valid explanation earn the student - a prize, extra credit, a feeling of goodness?

Friday, March 12, 2010

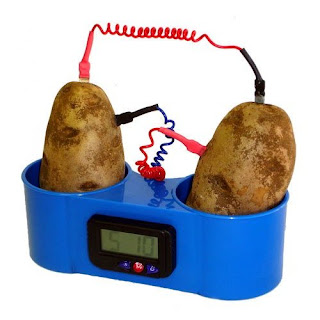
How Does That Work? Potato Clock

The first of the How Does That Work? series on the Science Matters blog. I will periodically show you products and demonstrations that you can present to your students and challenge them to explain the science of how they work. Make sure you decide ahead of time what you'll accept as a valid explanation - can it be printed straight off the internet, written in the student's own words, or does the student need to be able to explain it to you conversationally? What will a valid explanation earn the student - a prize, extra credit, a feeling of goodness?

I try to set out a new How Does That Work? or What is That? (more on that soon) challenge about once a month. It would be great to switch it up even more often, but I haven't yet built up my repertoire quite enough.

Up first...

The Potato Clock! Set one up and amaze your students. Change the power source regularly - all sorts of fruits and vegetables will work to power the clock, as well as some liquids! Challenge your students to explain how the potato clock works.

Here is one explanation that might help you and your students understand the process. The internet is full of explanations - some geared to younger students and some to older. Find something that meets your needs.